Wednesday, October 3, 2012

Crockpot Apple Sauce


I wanted to make a delicious apple sauce without adding sugar. It turned out to be quite simple and very tasty!  I went to a local orchard and asked them if they had any "seconds".  They brought me out a huge bushel of mixed apples and said they would give them to me for $5!  I ended up taking 2 bushels, can't beat that price!  Here is what you will need...

Equipment:
  • Crockpot
  • Food mill (strainer will work, but will be very time consuming)
  • Knife and cutting board, of course


Ingredients:
  • Apples - enough to fill your crockpot
  • Cinnamon
  • Apple Cider or Water

Wash, core, trim the bad spots (if necessary) and cut your apples.  Do not peel them!!!!  Peeling them would be a royal pain and a complete waste of time.  In addition to that, I believe that the peels have a distinct flavor and are good to have in the sauce.  Put a little water or cider in the bottom of the crockpot, about 1/4 cup, to keep the apples from burning until the apples begin to release their juices.  Pack your cut apples into the pot sprinkle liberally with cinnamon.  Put the lid on and cook for 6-8 hours on low, best to stir every 1-2 hours.  My crockpot took 6 hours, but it always cooks fast.  Next, ladle your sauce into the food mill and crank the mill to get the clean sauce out.  All of the peels will be left behind and any apple chunks will be pureed.  You will have perfect hot applesauce that everyone will love!

If you have any apples leftover that didn't fit into your crockpot, you might want to whip up a batch of peanut butter apple cookies!  I tried this recipe from taste of home and it was awesome!!!!  Apple-Peanut-Butter-Cookies

Here is a little photo diary of how I made the apple sauce...
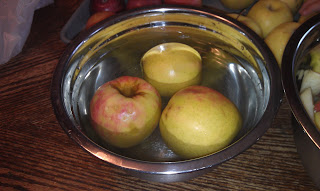
Wash, I just rolled them in water (lazy;)  My daughter had fun with this one!

My quick core and cut method, works wonders!
Stuff the pot with apples
Add the cinnamon
What it looks like after about 6 hours.  You do need to stir periodically (once every 1-2 hours)
My 3 year old turning the apples in the food mill.  She is having a ball doing it!
The finished apple sauce, YUMMY!!!


I am making crock pot apple butter right now with the rest of the apples, can't wait until that is done, it smells amazing!!  I'll post it when I'm done.  Enjoy!


Pin It Now!

Sunday, September 16, 2012

Poopy Crayon Wall Art

I have seen beautiful crayon wall are all over Pinterest lately.  My girls and I decided to make one to fill a wall in our bathroom.  It turned out to be a very unique piece, I love it!


Here is how we did it...

Materials:

  • Crayola crayons
  • canvas
  • hot glue gun
  • hair dryer
  • drop cloth ( I used a shower curtain liner)
  • razor or xacto knife
  • drill
  • rope or basket weaving seagrass (for basketweaving)

Optional Materials:

  • stamps
  • acrylic paint
  • painters tape

  • To create a hanger for a flat canvas and need a way to hang it.  Drill a hole in each of the top two corners that is the same diameter of the rope or seagrass you are using.  Thread your rope or seagrass through and tie and nice tight knot on each end.  You now have a perfect hanger.

I used seagrass for hanging in this picture
  • To create the artwork first solidly hot glue crayons to the top of the canvas in the order that you want the colors to drip.  Make sure that you give them some spacing so the colors can drip.

  • If you would like a blank area on the canvas this is the time to use painters tape and block it off.  


  • Once you have all of the crayons hot glued you are ready to begin.  Working over the drop cloth, hold the canvas on a slight angle and start blow drying the crayons.  Work on one small section at a time.  You will get a different look according to how you place the heat.  We found that quite a few of the crayons did what I called "pooped" out, it gave it a neat look.  They cooled and stuck to the canvas before falling off.  You can also alter the angle that you hold the canvas to change how far the wax melts.
if you look carefully at the green, you will see that the crayon is "pooping" out.
  • When we had the crayons melted to our liking the artwork looked like this...
notice all the poopy crayons!  :)  
  • It is now time to remove our painters tape.  Since there is wax on top of the tape and I don't want it to break off, I am going to cut the wax.  Very carefully, use a razor blade or xacto knife and cut the areas with wax.  Do not cut the canvas!  You really only have to lightly push down on the wax.
cutting the wax in preparation for removing the tape

  • If you want to stamp your artwork, you can do so now.  We used the stamps below with acrylic paint.


My 8 year old helped me with this.  She actually did the majority of the blow drying while I held the canvas.  The poopy crayons make for a really cool look and I love the straight line from the tape with the wild shapes elsewhere.  The best part, my lil 3yr old decided to come and grab one of the poopy crayons taking a big chunk out of the middle of the picture!  We were able to melt the attacked crayon with the blow dryer for a few seconds and the destruction was nonexistent!

poopy crayon art


Pin It Now!

Tuesday, September 11, 2012

911 In Remembrance

I remember the morning and how beautiful it was.   
I remember exactly where I was sitting.
I remember my boss running in to the lab and telling me that a planes crashed into one tower.
I remember not believing her.
I remember seeing the truth in pure horror.
I remember seeing it happen again.
I remember the feelings of pain for all there.
I remember seeing people jump from the towers.
I remember my husband calling saying that the towers were engineered to withstand planes.
I remember the first crumble.
I remember the second fall.
I remember the pentagon getting attacked next.
I remember the fear everyone felt knowing we were sitting in a potential target.
I remember thinking of my daughter at daycare.
I remember hearing of the final plane in Pennsylvania.
I remember the feelings of loss and pride when knowing those passengers fought to the death to save others.
I remember when we were told to evacuate base and go home.
I remember how special it was to hug my daughter.
I remember that absolutely all tv stations covered the attack.
I remember seeing how many rescue personnel and citizens came out to help one another.
I remember the stickers, flags, ribbons, banners of our flag that were everywhere you looked.
I remember liking that.
I will never forget to teach my children what happened and especially how it felt.

My flag flies today, my heart goes out to all families and loved ones of the 911 victims!
I thank all rescue personel for what they did then and continue to do today!

God Bless All Pin It Now!

Pretty Polish Girl

There is a new blog on the block.  My daughter has been given permission by me to start a blog about painting nails.  She seems to have a never ending knowledge of nail techiques and we are always having to smell the polish around the house.  I figured she ought to be allowed to have an outlet for one of her true loves.  Check out her first post about making Elmo's face on your nails, it is very cute!  Pretty Polish Girl - Elmo Nails

It's a stunning day in my part of the world, I hope it is in yours too! Pin It Now!

Friday, September 7, 2012

Chalk Holders

My 3 year old loves drawing on her chalkboard and she makes a big mess doing so.  I decided to look for some of those chalk holders the teachers had when I was a kid.  They had them on Amazon, but they ran an average of $10 each!  So I went to the net for directions to make my own.  I could find only 1 tutorial on the net for them, it was using bamboo.  I took some chalk to the craft store and tried it in the bamboo I couldn't find any that was the right size for the chalk to fit snug.  Even some bamboo that was split wouldn't open enough to accept the chalk.  On top of that, the bamboo was $14!  I believe the author of this tutorial I had used green bamboo from his yard.  Anyway, looking around the store I picked up some flower styrofoam.  I guess you could use any kind that is tough, green or white.  Just stay away from the floral foam made to hold water.  The video below shows how to make the holders. I made 5 holders from one rectangle piece of foam for a total of $2.56, with a 40% coupon of course! ;)  Can't wait to make some for sidewalk chalk!  View the video below to see how I made them...


The chalk holder at work.  Of course, my daughter has to have pink chalk.  

The older girls decided that they didn't like the texture of the foam that much.  We wrapped the holder with packing tape, problem solved!


Pin It Now!